
Yes, we are talking about healthy, probiotic SODA! That may seem like an oxymoron, but it is not only possible, it is easy, cheap, and fun. True story, you get carbonated, fizzy probiotic goodness and all you need are water kefir grains, sugar, filtered water and your favorite fruit for flavoring. You are probably wondering how to even pronounce that word in the title: kefir. I say “Kee-fur,” I have a friend who says “Keh-fur” and I’ve been told we are both wrong and it’s pronounced “Keh-fear.” So there you go. Feel free to choose whatever pronunciation works for you because that’s less important than just getting some kefir grains bubbling on your counter to make this immune-boosting soda.
I’ve read lots of information on water kefir and how you should/ought/must make it. All that information can make this simple process seem overwhelming. So what I’m going to share with you here is how I make it (which may or may not differ from some of the should/ought/must make instructions you will find online, but it works for me). If you can pour water, you can do this!
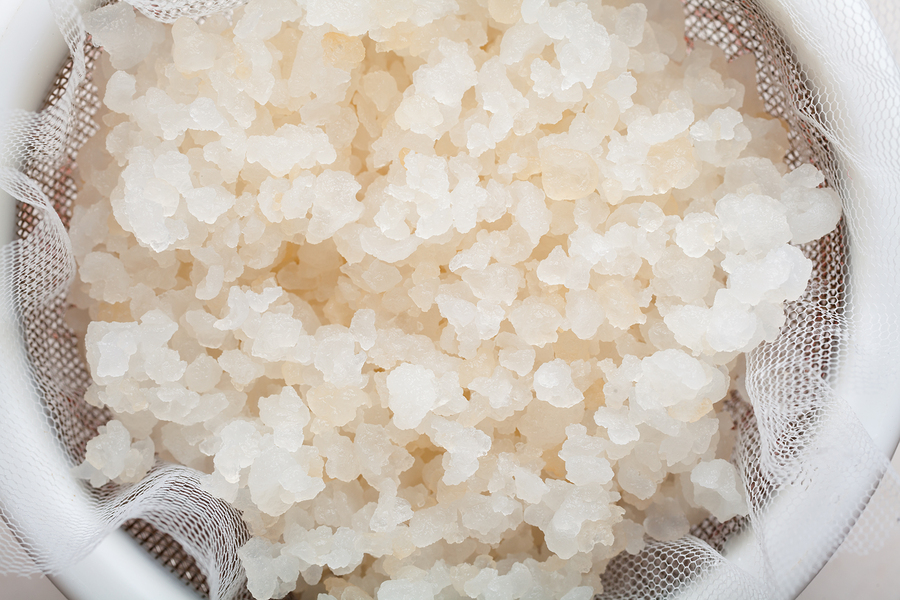
First, water kefir grains, what are they? They really aren’t “grains” at all. They are what is called a SCOBY, which stands for “symbiotic colony of bacteria and yeast.” Basically they are a growing mass of probiotics. I am happy to just say that they are cool and you should get some, but if you need more than that, here is a more official definition:
“Water kefir grains, or tibicos, are a symbiotic culture of bacteria and yeasts held in a polysaccharide biofilm matrix created by the bacteria. As with kefir grains, the microbes present in tibicos act in symbiosis to maintain a stable culture. Tibicos can do this in many different sugary liquids, feeding off the sugar to produce lactic acid, alcohol (ethanol), and carbon dioxide gas, which carbonates the drink.”
There are two kinds of kefir grains: ones that grow in sugar water and ones that grow in milk. So make sure you get the ones that match the liquid you are going to use. (We’ll discuss milk kefir in a different post) Like all wonderful things in nature, kefir “grains” reproduce easily, so it is easy to get some from a friend, from the classifieds, or even from Amazon for just a few dollars. You only need a tablespoon or two of “grains” to make a quart of water kefir.
Alcohol content is one thing that many people are concerned about as they begin creating probiotic drinks. I was as well. I researched this thoroughly before even beginning my kefir journey. I am happy to report that testing shows that at 2-3 days, water kefir has less alcohol than a ripe banana. Trace amounts of alcohol are just a natural part of food, especially in fruit. Kefir is a completely different animal than “strong drinks” that are brewed to create alcohol. This fermenting process is more like yogurt. I serve kefir (along with ripe bananas and yogurt) to my kids without a second thought about the trace amount of alcohol.
Besides the chance to satisfy your carbonated cravings, the biggest reason to give kefir a try is pure math. A tablespoon of this stuff has exponetionally more probiotics than any pill and it is FREE! People spends hundreds a month on probiotics when this will grow happily on their counter top for only the price of a few minutes of effort! Think what drinking a cup of this every day could do for your health! Our digestive systems are meant to eat fermented food every day. If we don’t, our digestive and immune systems are literally starving to death. But you can turn that around. Kefir is the easiest, cheapest, yummiest way to keep the doctor away.
So what equipment do you need to make this miracle drink? Just a glass jar and a lid. That is the best part about kefir: no complicated equipment, no complicated process. My favorite jar for all probiotic creations is the fido jar. But mason jars with a metal ring also work wonderfully. I get fizzy kefir most of the time with this method. (sometimes the grains are moody and they just don’t fizz but not very often.) I use a quart jar for both the first and second ferments as well as for storing. That being said, keep an eye out for our soon-to-be-released products page, where we will share our favorite gadgets for healthy food prep, including some fermenting bottles that are on MY wish-list!
There are many warnings about kefir bottles exploding. I haven’t personally experienced it, but I have seen photos and it can be bad. It’s important to use good quality jars (i.e. avoid dollar store jars even if they are super cute) and to release the pressure every 12 or so hours while your grains work.
I think water kefir is a bit of an acquired taste, but when you start to drink it and your body loves you for it, you will start to crave the stuff. I love water kefir and drink it almost daily. My children will occasionally drink a glass but aren’t big fans. They will however down kefir popsicles so that’s where most of the water kefir goes around our house and I just smile when I see them go for another popsicle. Booyah, mom for the win!
If this sounds intriguing but overwhelming, we have a solution for that too! Once you see this done in person and get that chance to do it yourself you will see how simple it is and your confidence will soar. If you would love a hands-on demonstration and full tasting table of multiple kinds of kefir, yogurt and many other probiotic snacks, join us for our retreat May 5-7. It is full of “get-your-own-hands-into-it” and “fill-your-stomach-with-luscious-goodness” classes. You, your kitchen, and your health will soar to a new level, guaranteed!
Mellonee

Affiliate Products We Love for This Recipe:
[table id=12 /]
Recent Comments